Realtime Identity Card Recognition Using Webcam
In the digital age, validating the legitimacy of identity cards is important in a variety of fields. Using the technology, we can automate this process. In this article, we will look at how to perform real-time identity card recognition using a webcam and an API.
Traditional methods of authenticating identity cards sometimes involve manual examination, which is time-consuming and prone to errors. However, with real-time identification card recognition, this procedure has become efficient.
Real-time identification card recognition is being used in a variety of fields, each with its own set of benefits:
Security & Access Control:
In high-security circumstances such as airports, government buildings, and corporate headquarters, it is critical to verify the identity of individuals. Security professionals may quickly screen entries using real-time recognition technology, which immediately flags any unlawful entry attempts.
Retail and Hospitality:
Retailers and hospitality providers may use this technology to improve client experiences while lowering fraud risk. Age verification methods at pubs or tobacco shops can be streamlined to ensure legal compliance.
Financial Services:
Real-time identification card recognition has the potential to assist banks and insurance companies greatly. Institutions may improve account opening operations by automating the client onboarding process, lowering administrative costs and improving overall efficiency. Furthermore, fraud detection techniques might be upgraded to prevent identity theft and fraudulent transactions.
Education and Healthcare:
By automating identity verification processes, educational institutions and healthcare facilities may improve administrative workflow efficiency. Real-time recognition technology streamlines documentation requirements for everything from school registration to patient admissions, allowing personnel to focus on providing excellent services.
Now, we'll set up real-time card recognition with a webcam and a third-party API called ID Analyzer API.
You might be wondering why we picked this specific API. Well, after rigorous testing of several possibilities, ID Analyzer emerged as the best pick due to its performance and strong features.
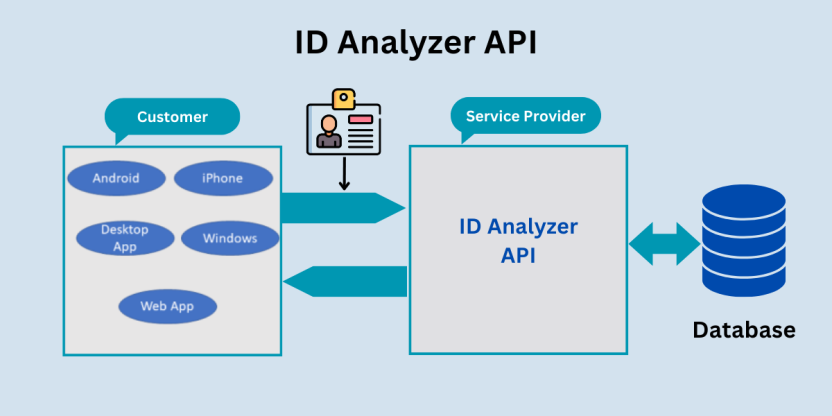
What is an ID Analyzer?
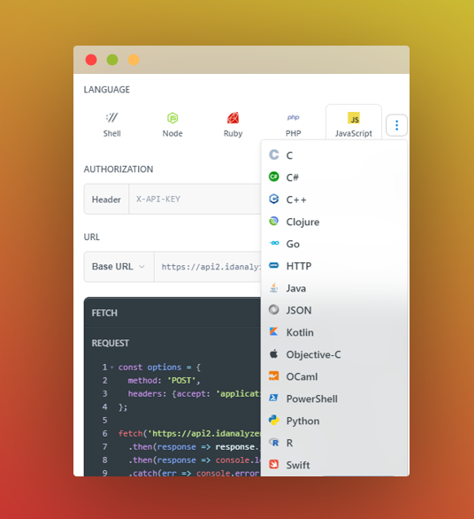
ID Analyzer is an acclaimed SaaS provider of identity verification APIs. Their ID Verification API provides strong features for validating official documents like passports, driver's licenses, and ID cards. With their API, developers can easily integrate identity verification into their apps, assuring compliance and security. ID Analyzer also supports a broad range of programming languages, boosting its versatility and accessibility.
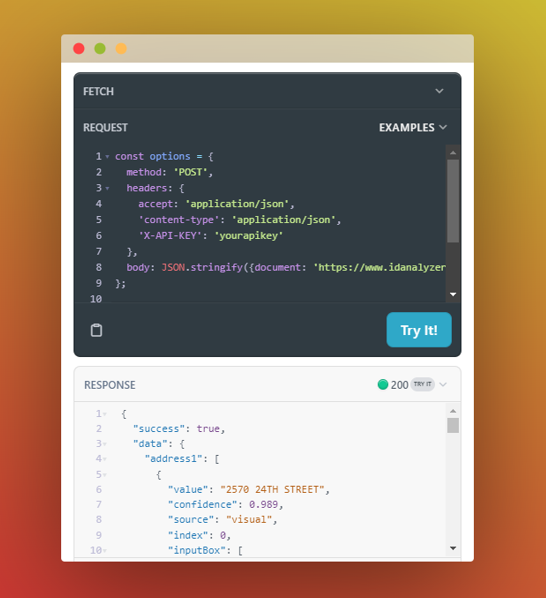
For testing purposes, the document can also be checked from the ID Analyzer site by using the ID Analyzer API.
Prerequisites
Before we begin, please ensure you have the following:
- An ID Analyzer API key.
- Basic understanding of HTML, JavaScript, and CSS.
- A webcam-enabled gadget.
- A Text Editor.
Setup
Follow these instructions to set up the real-time identification card recognition system using a webcam.
- Open Text Editor:
Open your text editor. If you don't have one installed, you can use a simple text editor such as Notepad (Windows) or TextEdit (Mac).
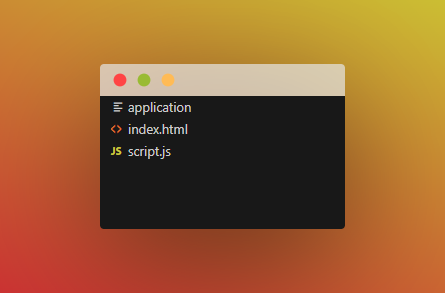
- Create an HTML File
- Create a new file in the text editor and save it with 'index.html'.
- Copy and paste this code into the file:
<!DOCTYPE html>
<html lang="en">
<head>
    <meta charset="UTF-8">
    <meta name="viewport" content="width=device-width, initial-scale=1.0">
    <title>Webcam Quickscan</title>
Explanation:
It indicates that the document follows the HTML5 standards.
The lang attribute indicates the language of the document content.
This is the opening tag of the head section within the HTML document.
This meta element shows the document's character encoding, which is set to UTF-8. UTF-8 is a character encoding system that accepts a variety of characters.
This meta element specifies the viewport settings for the document. The width=device-width attribute adjusts the viewport's width to match the device's width. The initial-scale=1.0 attribute determines the initial zoom level when a page is first loaded.
- Webcam Quickscan
This element specifies the title of the HTML page, which appears in the title bar of the browser.
    <style>
        body {
            font-family: Arial, sans-serif;
            margin: 0;
            padding: 0;
            display: flex;
            justify-content: center;
            align-items: center;
            flex-direction: column;
            height: 100vh;
            background-color: #f5f5f5;
        }
Explanation:
- body
This focuses on an element in the HTML page.
- font-family: Arial, sans-serif;
This attribute defines the font family that will be used for text content inside the body element. When Arial is not available, it switches to sans-serif.
- margin: 0;
This eliminates the default margin around the body element.
- padding: 0;
This eliminates the body element's default padding.
- display: flex;
This uses a Flexbox layout on the body element, allowing for adaptable and responsive placement of its subordinate elements.
- justify-content: center;
This parameter aligns the body's subordinate components horizontally along the main axis of the flex container.
- align-items: center;
This parameter aligns the body's subordinate components vertically along the cross-axis of the flex container.
- flex-direction: column;
This parameter specifies the way the main axis of the flex container ought to move. As it is set to a column, it means that the subordinate components will be placed vertically.
- height: 100vh;
This sets the body element's height to 100% of the viewport height.
- background-color: #f5f5f5;
This changes the body element's background colour to a light grey.
        #video {
            width: 100%;
            max-width: 600px;
            border: 1px solid #ccc;
            border-radius: 5px;
            margin-bottom: 20px;
        }
Explanation:
- '#video'
This selects the HTML element with the ID "video".
- width: 100%;
This sets the element's width to 100% of its parent container's width, guaranteeing that it fills the whole container's width.
- max-width: 600px;
This sets the element's maximum width to 600 pixels.
- border: 1px solid #ccc;
This attribute adds a border to the element. It is made out of a 1-pixel-wide solid line in the grey colour.
- border-radius: 5px;
This adds rounded edges to the element's border. The border-radius is set to 5 pixels to give the element a rounded shape.
- margin-bottom: 20px;
This creates a gap beneath the element by specifying a bottom border of 20 pixels.
        #capture-btn {
            padding: 10px 20px;
            background-color: #007bff;
            color: #fff;
            border: none;
            border-radius: 5px;
            cursor: pointer;
        }
    </style>
</head>
Explanation:
- '#capture-btn'
This selects the HTML element with the ID "capture-btn".
- padding: 10px 20px;
This specifies the element's padding.
- background-color: #007bff;
This specifies the element's background colour.
- color: #fff;
This specifies the element's text colour.
- border: none;
This eliminates the element's border.
- border-radius: 5px;
This attribute displays the element's border with rounded edges.
- cursor: pointer;
When the user moves over an element, this attribute transforms the cursor of the mouse to a pointer, suggesting that it is clickable.
<body>
    <header>
        <h1>Webcam Quickscan</h1>
    </header>
Explanation:
This is the opening tag of the body section of the HTML document.
This is the opening tag of the header section of the HTML document.
This header element denotes the webpage's title or main heading. In this case, the main heading is 'Webcam Quickscan'.
This is the closing tag of the header section of the HTML document.
<main>
    <video id="video" autoplay></video>
    <canvas id="canvas" style="display: none;"></canvas>
    <button id="capture-btn">Capture Image and Perform Quickscan</button>
</main>
Explanation:
This is the opening tag of the main content section of the HTML document.
This video element integrates video or multimedia material into the webpage. The autoplay element is also added to direct the browser to start playing the video right after it is loaded.
The canvas element is used to render images or visual material. The style attribute specifies "none" as the CSS property display, which conceals the canvas element from the user interface.
- Capture Image and Perform Quickscan
The clickable button on the webpage is added by using the button element. The label for the button is "Capture Image and Perform Quick Scan."
This is the closing tag of the main content section of the HTML document.
<script src="script.js"></script>
</body>
Explanation:
This is used to link JavaScript files within an HTML document.
This is the closing tag of the body section of the HTML document.
</html>
Explanation:
This closing tag indicates the end of the HTML page.
Complete code in index.html File
<!DOCTYPE html>
<html lang="en">
<head>
    <meta charset="UTF-8">
    <meta name="viewport" content="width=device-width, initial-scale=1.0">
    <title>Webcam Quickscan</title>
    <style>
        body {
            font-family: Arial, sans-serif;
            margin: 0;
            padding: 0;
            display: flex;
            justify-content: center;
            align-items: center;
            flex-direction: column;
            height: 100vh;
            background-color: #f5f5f5;
        }
        #video {
            width: 100%;
            max-width: 600px;
            border: 1px solid #ccc;
            border-radius: 5px;
            margin-bottom: 20px;
        }
        #capture-btn {
            padding: 10px 20px;
            background-color: #007bff;
            color: #fff;
            border: none;
            border-radius: 5px;
            cursor: pointer;
        }
    </style>
</head>
<body>
    <header>
        <h1>Webcam Quickscan</h1>
    </header>
    <main>
        <video id="video" autoplay></video>
        <canvas id="canvas" style="display: none;"></canvas>
        <button id="capture-btn">Capture Image and Perform Quickscan</button>
    </main>

    <script src="script.js"></script>
</body>
</html>
- Create JavaScript File
- Now, create a new JavaScript file called 'script.js' in the same directory as your HTML file.
- Using your text editor, open the script.js file and paste the following code:
const video = document.getElementById("video");
const canvas = document.getElementById("canvas");
const captureButton = document.getElementById("capture-btn");
Explanation:
- const video = document.getElementById("video");
This line declares a constant variable called video. It selects an HTML element with the ID "video" by calling the document.getElementById() function and assigns the specified HTML element to the variable video.
- const canvas = document.getElementById("canvas");
This line declares a constant variable called canvas. It selects an HTML element with the ID "canvas" by calling the document.getElementById() function and assigns the specified HTML element to the variable canvas.
- const captureButton = document.getElementById("capture-btn");
This line declares a constant variable called captureButton. It selects an HTML element with the ID "capture-btn" by calling the document.getElementById() function and assigns the specified HTML element to the variable captureButton.
// Access the webcam and stream video
navigator.mediaDevices
  .getUserMedia({ video: true })
  .then((stream) => {
    video.srcObject = stream;
  })
  .catch((error) => {
    console.error("Error accessing the webcam: ", error);
  });
Explanation:
- 'navigator.mediaDevices.getUserMedia({ video: true })'
This line of code launches a request to access the user's media devices, with a particular emphasis on the video input, which is often the camera. The navigator.mediaDevices object in JavaScript represents the browser's media devices. This interface includes the getUserMedia() function, which prompts the user for permission to use media inputs such as cameras and microphones. The { video: true } field in getUserMedia() acts as a constraints object, indicating that the request is only for access to the video stream. By setting the video attribute to true, the code clearly states that it wants to access the video input, allowing the video stream from the user's camera to be retrieved.
- '.then((stream) => { video.srcObject = stream; })'
If the user authorizes permission to use the webcam, the code executes the 'then' block. This block receives a stream object, which represents the video stream coming directly from the camera. To include this stream into the webpage, use 'video.srcObject = stream;', which assigns the received stream to the'srcObject' property of the 'video' element. This operation causes the '' element to display the webcam's live video stream. By assigning the 'srcObject' attribute to the received stream, the webpage may seamlessly include and display the real-time video stream from the user's webcam, enabling a variety of interactive and multimedia applications.
- '.catch((error) => { console.error("Error accessing the webcam: ", error); })'
If there is an issue accessing the camera, such as when the user declines permission or the device does not have a webcam, the code will run the 'catch' block. This block passes the error observed as a parameter, enabling effective error handling. The error message is then recorded to the console using 'console.error()'. This logging technique gives the developer or user fast feedback on the precise issue encountered while attempting to access the camera. By reporting the error message to the console, developers may quickly analyze and resolve any issues with camera access, resulting in a better user experience and streamlining debugging efforts.
// Function to perform quickscan using ID Analyzer Quickscan API
function performQuickScan(imageData) {
  // Set up options for fetch request

  // Call ID Analyzer Quickscan API
  const quickScanUrl = "https://api2.idanalyzer.com/quickscan";
  const quickScanApiKey = "your-api-key"; // Replace with your actual quickscan API key

  // Construct the request body
  const requestBody = {
    saveFile: true,
    document: "https://www.idanalyzer.com/assets/testsample_id.jpg",
  };

  // Make the fetch request
  fetch(quickScanUrl, {
    method: "POST",
    headers: {
      Accept: "application/json",
      "Content-Type": "application/json",
      "X-API-KEY": quickScanApiKey,
    },
    body: JSON.stringify(requestBody),
  })
    .then((response) => response.json())
    .then((data) => {
      console.log("Quickscan results: ", data); // Log the quickscan response data to the console
    })
    .catch((error) => {
      console.error("Error performing quickscan: ", error);
    });
}
Explanation:
- Function to Perform Quickscan using ID Analyzer Quickscan API:
This code specifies a JavaScript method called performQuickScan, which is responsible for running a quickscan using the ID Analyzer Quickscan API.
- Call ID Analyzer Quickscan API:
The code specifies the ID Analyzer Quickscan API URL (quickScanUrl) and the API key required for authentication (quickScanApiKey). Please replace "your-api-key" with your real Quickscan API key.
- Construct the Request Body:
The request body is created, which contains parameters like saveFile (set to true to save the file) and document (the URL of the document to be scanned). In this situation, a sample picture URL is provided for demonstration.
- Make a fetch request:
The fetch method sends a POST request to the Quickscan API endpoint (quickScanUrl) using the supplied parameters and request body. Accept and Content-Type headers are set to "application/json", as is the API key (X-API-KEY), which is necessary for authentication. JSON.stringify() is used to serialize the request body before it is submitted in the fetch request. - Handle Response:
The response received from the API is processed into JSON using the.json() function. Then, a then() function is used to process the JSON response data and log it to the console. - Error Handling:
In the event of a problem during the retrieve request, the catch() function is called, which logs the error to the console using console.error().
// Capture image from the webcam and trigger quickscan
captureButton.addEventListener("click", () => {
  canvas.width = video.videoWidth;
  canvas.height = video.videoHeight;
  const context = canvas.getContext("2d");
  context.drawImage(video, 0, 0, canvas.width, canvas.height);
  const imageData = canvas.toDataURL("image/png");
  // Call function to perform quickscan using the captured image data
  performQuickScan(imageData);
});
Explanation:
- Capture a picture from the camera and activate quick scan:
This code adds an event listener to the captureButton element, which is usually a button on a webpage that acts when clicked.
- Function of the Event Listener:
The event listener function is defined with arrow function syntax () => {... }.
This method is invoked when the captureButton is pressed.
- Set Canvas Size:
The canvas element's width and height are adjusted to match the proportions of the video being streamed from the camera. This guarantees that the canvas covers the whole video frame.
- Capture a Video Frame:
- The canvas context (context) is retrieved using getContext("2d"), which returns a 2D drawing context for the canvas.
- The drawImage() function draws the current video frame onto the canvas. This essentially records a picture from the camera.
- Convert Image Data to a URL:
The toDataURL() function converts picture data on the canvas into a data URL representation. - Trigger QuickScan:
Once the picture data has been recorded and transformed into a data URL, the performQuickScan() method is invoked, providing the acquired image data as input. - Perform QuickScan Function:
The performQuickScan() method performs a quickscan utilizing the ID Analyzer Quickscan API. It accepts recorded picture data as input and begins the quick scan procedure with this data.
Complete code in script.js File
// script.js

const video = document.getElementById("video");
const canvas = document.getElementById("canvas");
const captureButton = document.getElementById("capture-btn");

// Access the webcam and stream video
navigator.mediaDevices
  .getUserMedia({ video: true })
  .then((stream) => {
    video.srcObject = stream;
  })
  .catch((error) => {
    console.error("Error accessing the webcam: ", error);
  });

// Function to perform quickscan using ID Analyzer Quickscan API
function performQuickScan(imageData) {
  // Set up options for fetch request

  // Call ID Analyzer Quickscan API
  const quickScanUrl = "https://api2.idanalyzer.com/quickscan";
  const quickScanApiKey = "your-api-key"; // Replace with your actual quickscan API key

  // Construct the request body
  const requestBody = {
    saveFile: true,
    document: "https://www.idanalyzer.com/assets/testsample_id.jpg",
  };

  // Make the fetch request
  fetch(quickScanUrl, {
    method: "POST",
    headers: {
      Accept: "application/json",
      "Content-Type": "application/json",
      "X-API-KEY": quickScanApiKey,
    },
    body: JSON.stringify(requestBody),
  })
    .then((response) => response.json())
    .then((data) => {
      console.log("Quickscan results: ", data); // Log the quickscan response data to the console
    })
    .catch((error) => {
      console.error("Error performing quickscan: ", error);
    });
}

// Capture image from the webcam and trigger quickscan
captureButton.addEventListener("click", () => {
  canvas.width = video.videoWidth;
  canvas.height = video.videoHeight;
  const context = canvas.getContext("2d");
  context.drawImage(video, 0, 0, canvas.width, canvas.height);
  const imageData = canvas.toDataURL("image/png");
  // Call function to perform quickscan using the captured image data
  performQuickScan(imageData);
});
- Run the Application
- Navigate to the folder where you saved the HTML and JavaScript files. To open the HTML file in your web browser, double-click it or right-click and select "Open with" followed by your browser's name.
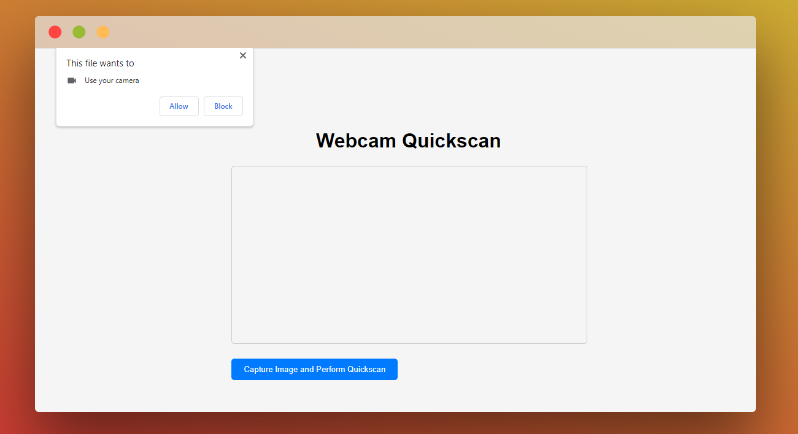
- When you open the HTML file in the browser, the camera stream will appear on the webpage. Below the camera feed, there will be a button titled "Capture Image and Perform Quick Scan." To capture a webcam image, click this button, but before that, allow your browser to use your camera.
- After pressing the button, the quick scan procedure will begin. The JavaScript code will submit the captured picture to the ID Analyzer Quickscan API for processing. The progress of the quick scan can be tracked in the console of your web browser's developer tools.
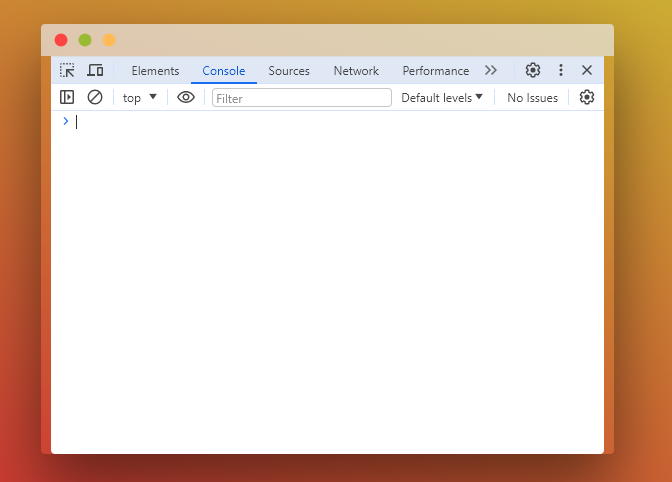
- To access the console, right-click on the webpage, choose "Inspect" or "Inspect Element," and then pick the "Console" tab. The results or errors that occurred throughout the rapid scan procedure will be presented in the console.
Now, let's take a picture of the driver's license and see whether everything is working properly.
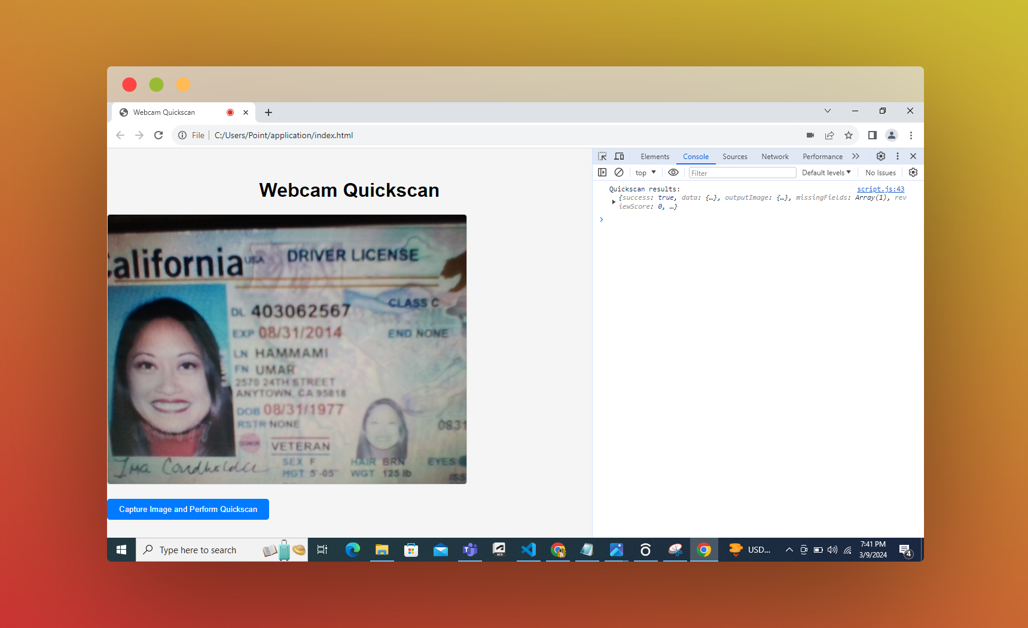
Console Output:
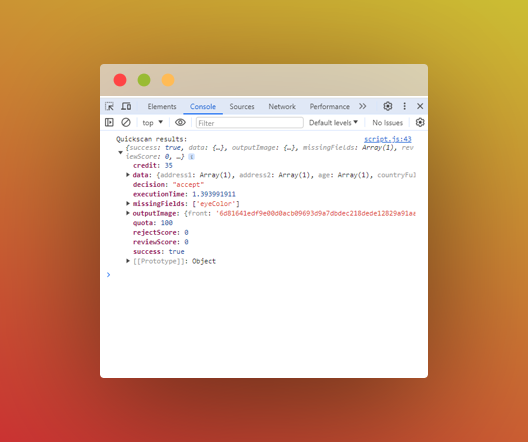
The output will be shown in JSON format. If there is a success, then 'success=true' will appear. The collected data will be displayed in the form of an array. If the card is accepted, then the decision will be accepted and 'accept' will be shown; else, 'in review' will be shown. The missing parameters will appear under 'missingFields'. In the given output, the eyeColor is missing. In addition, the execution time, output image, rejected score, and review score will also be included.
Updated about 2 years ago