Building an AML Compliance Web App
Building an AML Compliance Web App with ID Analyzer in Python
Introduction
In today's globalized economy, businesses work under increased regulatory pressure in view of combating money laundering and financial crimes and terrorist financing activities. Therefore, the ID Analyzer Anti-Money Laundering (AML) API becomes the key tool in this fight and comes with real-time all-in-one AML screening capability. It allows the business workflows to screen individuals and entities against global AML databases, sanction lists, and politically exposed persons (PEPs). This technology helps in identifying possible risks and also assures a company that they are adhering to international AML regulations. This definitely becomes a very essential tool for firms focused on staying integral and transparent about their operations.
Phases of Developing the AML Compliance Web Application
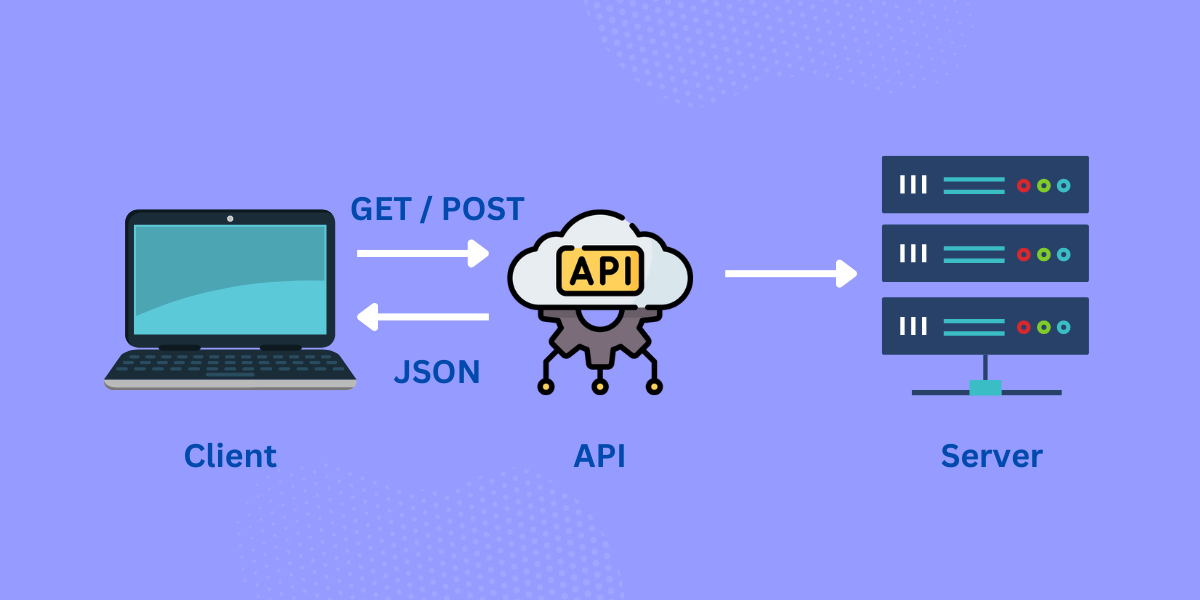
To effectively tackle the challenges of AML compliance and financial crime prevention, we will embark on a journey to create a web application powered by the ID Analyzer AML API. This application represents a vital tool for businesses aiming to streamline their compliance workflows and enhance their due diligence processes. The development of this application will be divided into distinct phases, each focusing on a specific aspect of the application's functionality. Let's explore these phases in detail to understand how they contribute to building a comprehensive solution for AML screening.
Prerequisites
Before we begin the journey of developing our AML compliance web application, it's crucial to ensure that we have all the necessary tools and information at our disposal. This preparation phase sets the foundation for a successful development process. Here are the prerequisites:
- Setting Up Visual Studio Code (VSCode)
- Installing Python
- Obtaining an API Key from ID Analyzer
- Installing Flask and Requests
Setting Up Visual Studio Code (VSCode):
Download and install Visual Studio Code
Installing Python:
Ensure that Python is installed on your system. Flask, our web framework of choice, is written in Python, making it a vital component of our development stack. Download Python from the official website.
Verify the installation by opening a terminal or command prompt and typing python --version. You should see the version number of Python displayed.
python --version
Obtaining an API Key from ID Analyzer:
Visit the ID Analyzer website and sign up or log in to access the dashboard.
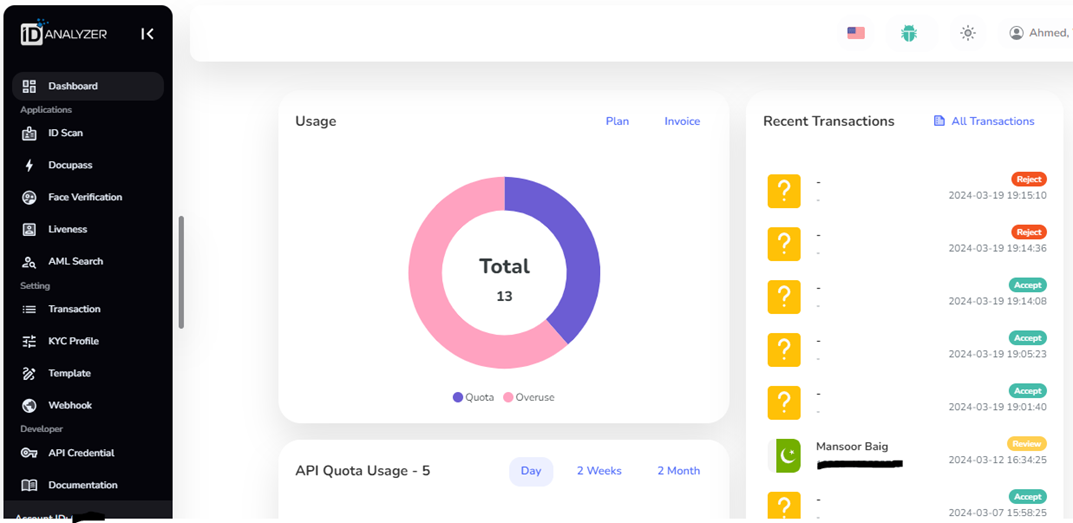
Navigate to the "API Credentials" section to find your API key. This key is essential for making requests to the ID Analyzer AML API and will be used in the backend development phase of our application.
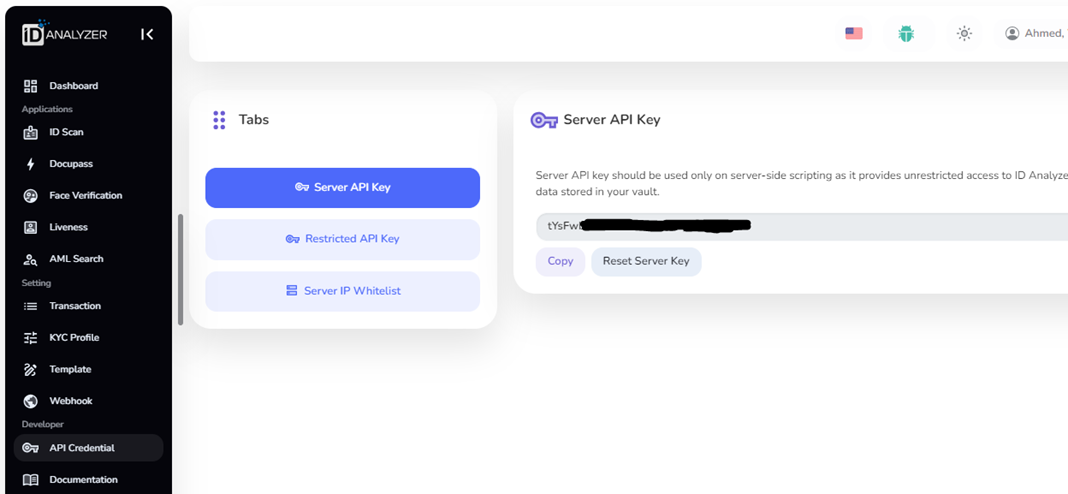
Installing Flask and Requests:
Flask is a micro web framework for Python that makes it simple to develop web applications. To install flask, open your terminal or command prompt and enter:
pip install flask
Requests is a Python library that simplifies making HTTP requests. Enter the following command to install requests:
pip install requests
Phase 1: Frontend Development
The frontend of our web application serves as the interface through which users interact with our AML screening tool. It is crucial for the frontend to be intuitive and user-friendly to ensure a smooth experience. In this phase, we'll build a form that users will fill out to submit data for AML checks.
Designing the User Interface with HTML and Bootstrap
The HTML Structure
<!doctype html>
  <html>
<head>
    <title>ID Analyzer</title>
    <link href="https://stackpath.bootstrapcdn.com/bootstrap/4.3.1/css/bootstrap.min.css" rel="stylesheet">
</head>
<body class="p-2 m-2">
<div class="container">
  <h2 class="mt-5">ID Analyzer Form</h2>
  <form method="post" class="mt-3">
    ...
  </form>
</div>
...
</body>
</html>
Title and Bootstrap: We start by defining the document type and importing Bootstrap via CDN to style our form. Bootstrap helps in making the form responsive and visually appealing.
Body and Container: Inside the body, we use a container class to wrap our content, providing it with a margin and padding according to Bootstrap's grid system.
The Form
<div class="form-group">
        <label for="name">Name</label>
        <input type="text" class="form-control" id="name" name="name" placeholder="Enter name">
        <small class="form-text text-muted">The name of the individual to be analyzed.</small>
    </div>
    ...
    <button type="submit" class="btn btn-primary">Submit</button>
Form Group: Each div with the form-group class represents a field in our form. It contains a label and an input field. For example, the name field allows users to input the name of the individual or entity they wish to screen.
Submit Button: A button of type submit is used to send the form data to the backend for processing.
Incorporating Jinja2 for Dynamic Content
In Flask, we can use Jinja2 templating to dynamically insert content into our HTML based on the backend's response. For instance, after a user submits the form, the backend performs the AML check and returns the results, which can be displayed below the form:
{% if response %}
    <div class="mt-5">
        ...
        {% for data in response.match %}
            ...
        {% endfor %}
    </div>
{% endif %}
Conditional Rendering: The {% if response %} block checks if there's any response data to display. If so, it renders a section that lists the matches found during the AML screening.
Looping Over Matches: Inside this conditional block, a {% for %} loop iterates over each match in the response, displaying the relevant information to the user.
This phase establishes the visual and interactive foundation of our application, enabling users to submit information for AML screening effortlessly. By leveraging Bootstrap for styling and Jinja2 for dynamic content rendering, we create a frontend that is both functional and engaging.
Phase 2: Backend Development
The backend phase involves setting up the Flask application, handling form submissions, making API calls to ID Analyzer, and displaying the results.
Setting Up the Flask Application
First, we initialize our Flask app and define a route to handle the form:
app = Flask(**name**)

@app.route('/', methods=['GET', 'POST'])
def form():
    ...
This sets up a basic Flask application that can respond to HTTP GET and POST requests at the root URL.
Handling Form Submissions
When the form is submitted, the backend captures the user input:
if request.method == 'POST':
    name = request.form['name']
    entity = request.form.get('entity', 0)  # Default to 0 (individual) if not provided
    country = request.form.get('country', '')  # Default to empty string if not provided
    ...
Here the entity is set to 0 or 1.
- 0 is for Person
- 1 is for Corporation/Legal Entity
Making the API Call
With the user's input, we construct a payload and make a POST request to the ID Analyzer AML API:
payload = {"name": name, "entity": entity, ...}
headers = {"accept": "application/json", "X-API-KEY": "YOUR_API_KEY"}

response = requests.post("<https://api2.idanalyzer.com/aml">, json=payload, headers=headers)
Displaying the Results
Finally, we parse the API response and pass it to the frontend for display:
response_data = response.json()
return render_template_string(HTML_TEMPLATE, response=response_data)
This backend logic serves as the backbone of our application, processing data, interacting with external services, and ensuring the user is presented with the needed information.
By detailing the frontend and backend development phases, we've laid out a comprehensive guide to creating a web application that utilizes the ID Analyzer AML API, emphasizing a clear separation between user interaction and server-side processing.
Here is the complete code:
from flask import Flask, request, render_template_string, jsonify
import requests

app = Flask(__name__)

HTML_TEMPLATE = '''
<!doctype html>
<html>
<head>
    <title>ID Analyzer</title>
    <link href="https://stackpath.bootstrapcdn.com/bootstrap/4.3.1/css/bootstrap.min.css" rel="stylesheet">
</head>
<body class="p-2 m-2">
<div class="container">
  <h2 class="mt-5">ID Analyzer Form</h2>
  <form method="post" class="mt-3">
    <div class="form-group">
        <label for="name">Name</label>
        <input type="text" class="form-control" id="name" name="name" placeholder="Enter name">
        <small class="form-text text-muted">The name of the individual to be analyzed.</small>
    </div>
    <div class="form-group">
        <label for="entity">Entity</label>
        <input type="text" class="form-control" id="entity" name="entity" placeholder="0 for individuals, 1 for companies">
        <small class="form-text text-muted">Specify 0 for individuals or 1 for companies.</small>
    </div>
    <div class="form-group">
        <label for="country">Country</label>
        <input type="text" class="form-control" id="country" name="country" placeholder="Country code (e.g., US)">
        <small class="form-text text-muted">Optional. Use ISO country codes (e.g., US, GB).</small>
    </div>

    <button type="submit" class="btn btn-primary">Submit</button>
  </form>
  </div>

{% if response %}
    <div class="mt-5">
        <h4 class="mb-4">API Response</h4>
        <div class="table-responsive">
            <table class="table table-bordered table-striped">
                <thead class="thead-dark">
                    <tr>
                        <th scope="col">Entity</th>
                        <th scope="col">Full Name</th>
                        <th scope="col">Alias</th>
                        <th scope="col">Date of Birth</th>
                        <th scope="col">Birthplace</th>
                        <th scope="col">Nationality</th>
                        <th scope="col">Note</th>
                        <th scope="col">Source</th>
                    </tr>
                </thead>
                <tbody>
                    {% for data in response.match %}
                        <tr>
                            <td>{{ data.entity }}</td>
                            <td>{{ data.fullname|join(', ') }}</td>
                            <td>{{ data.alias|join(', ') }}</td>
                            <td>{{ data.dob|join(', ') }}</td>
                            <td>{{ data.birthplace|join(', ') }}</td>
                            <td>{{ data.nationality|join(', ') }}</td>
                            <td>{{ data.note|join(', ') }}</td>
                            <td>
                                {% for source in data.source %}
                                    <a href="{{ source }}" class="btn btn-outline-primary btn-sm mb-1" target="_blank">Source</a><br>
                                {% endfor %}
                            </td>
                        </tr>
                    {% endfor %}
                </tbody>
            </table>
        </div>
    </div>
{% endif %}


</body>
</html>
'''

@app.route('/', methods=['GET', 'POST'])
def form():
    response_data = None
    if request.method == 'POST':
        name = request.form['name']
        entity = request.form.get('entity', 0)
        country = request.form.get('country', '')

        payload = {
            "name": name,
            "entity": entity
        }
        if country:
            payload["country"] = country

        headers = {
            "accept": "application/json",
            "content-type": "application/json",
            "X-API-KEY": "YOUR_API_KEY"
        }

        response = requests.post("https://api2.idanalyzer.com/aml", json=payload, headers=headers)
        response_data = response.json()

    return render_template_string(HTML_TEMPLATE, response=response_data)

if __name__ == '__main__':
    app.run(debug=True)
Don’t forget to enter your API Key in "X-API-KEY"
 headers = {
            "accept": "application/json",
            "content-type": "application/json",
            "X-API-KEY": "YOUR_API_KEY"
        }
When you execute the code the following lines will appear in the terminal window:
 * Debug mode: on
WARNING: This is a development server. Do not use it in a production deployment. Use a production WSGI server instead.
 * Running on http://127.0.0.1:5000
Press CTRL+C to quit
 * Restarting with stat
 * Debugger is active!
 * Debugger PIN: 132-841-588
Copy the http://127.0.0.1:5000 and paste it in your web browser. Then below page will appear:
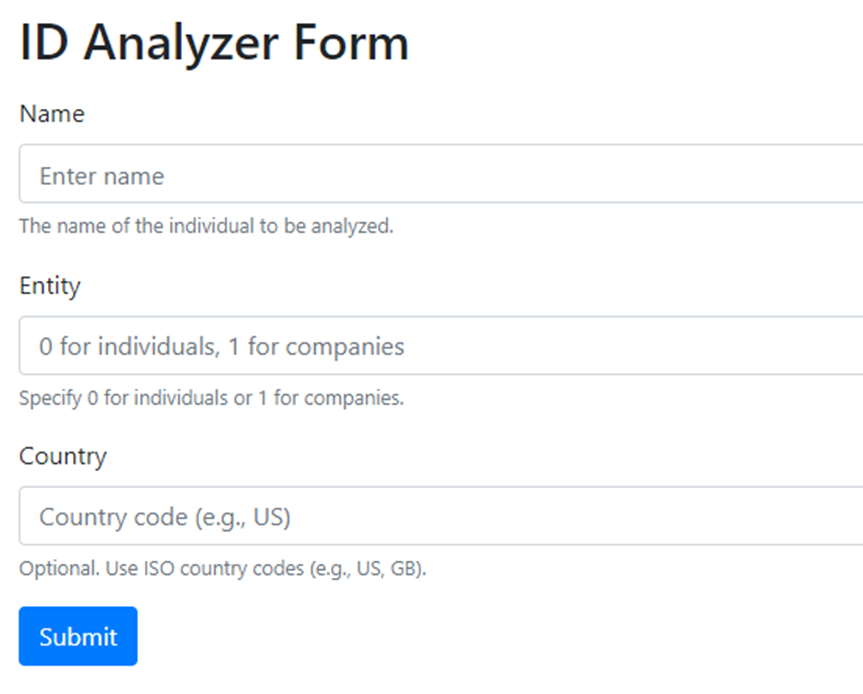
Enter the name, entity and country and then click on Submit. I entered some data:
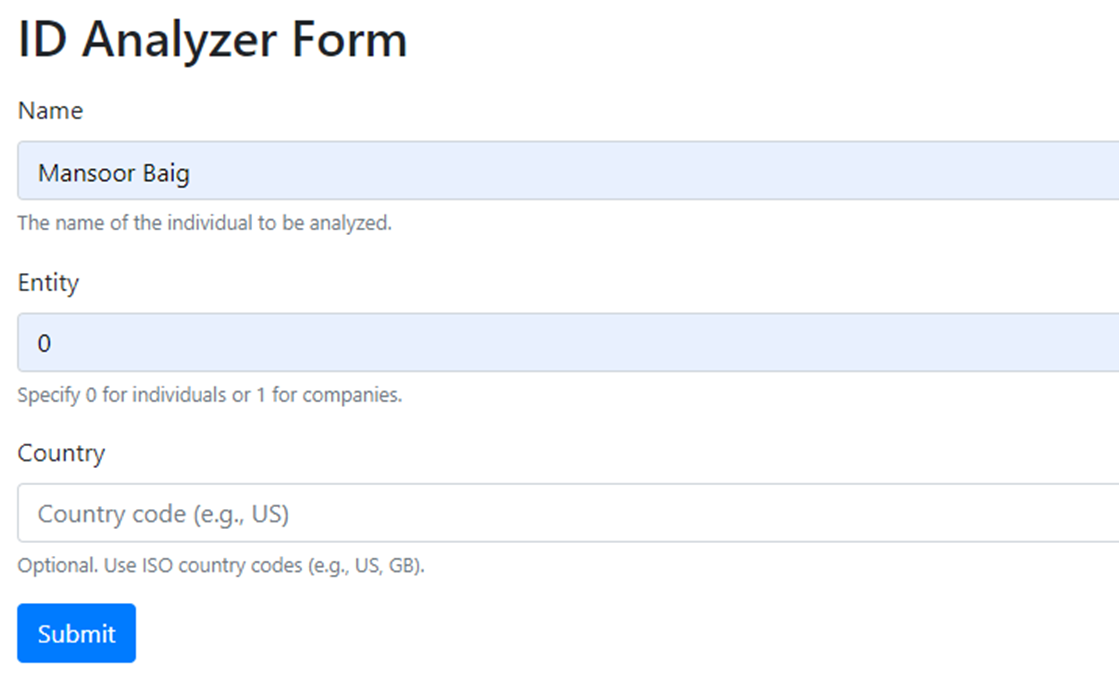
The results are:

As you can see there is no match found for this name. Now I will enter any other blacklist name and see the results.
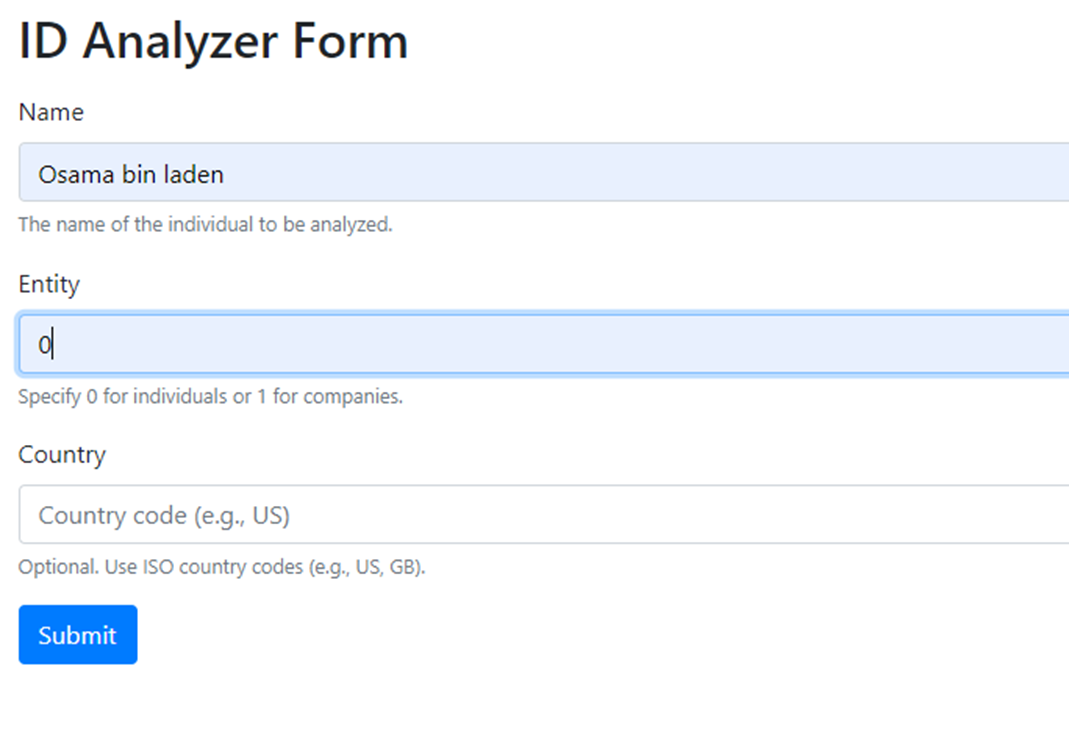
The results are:
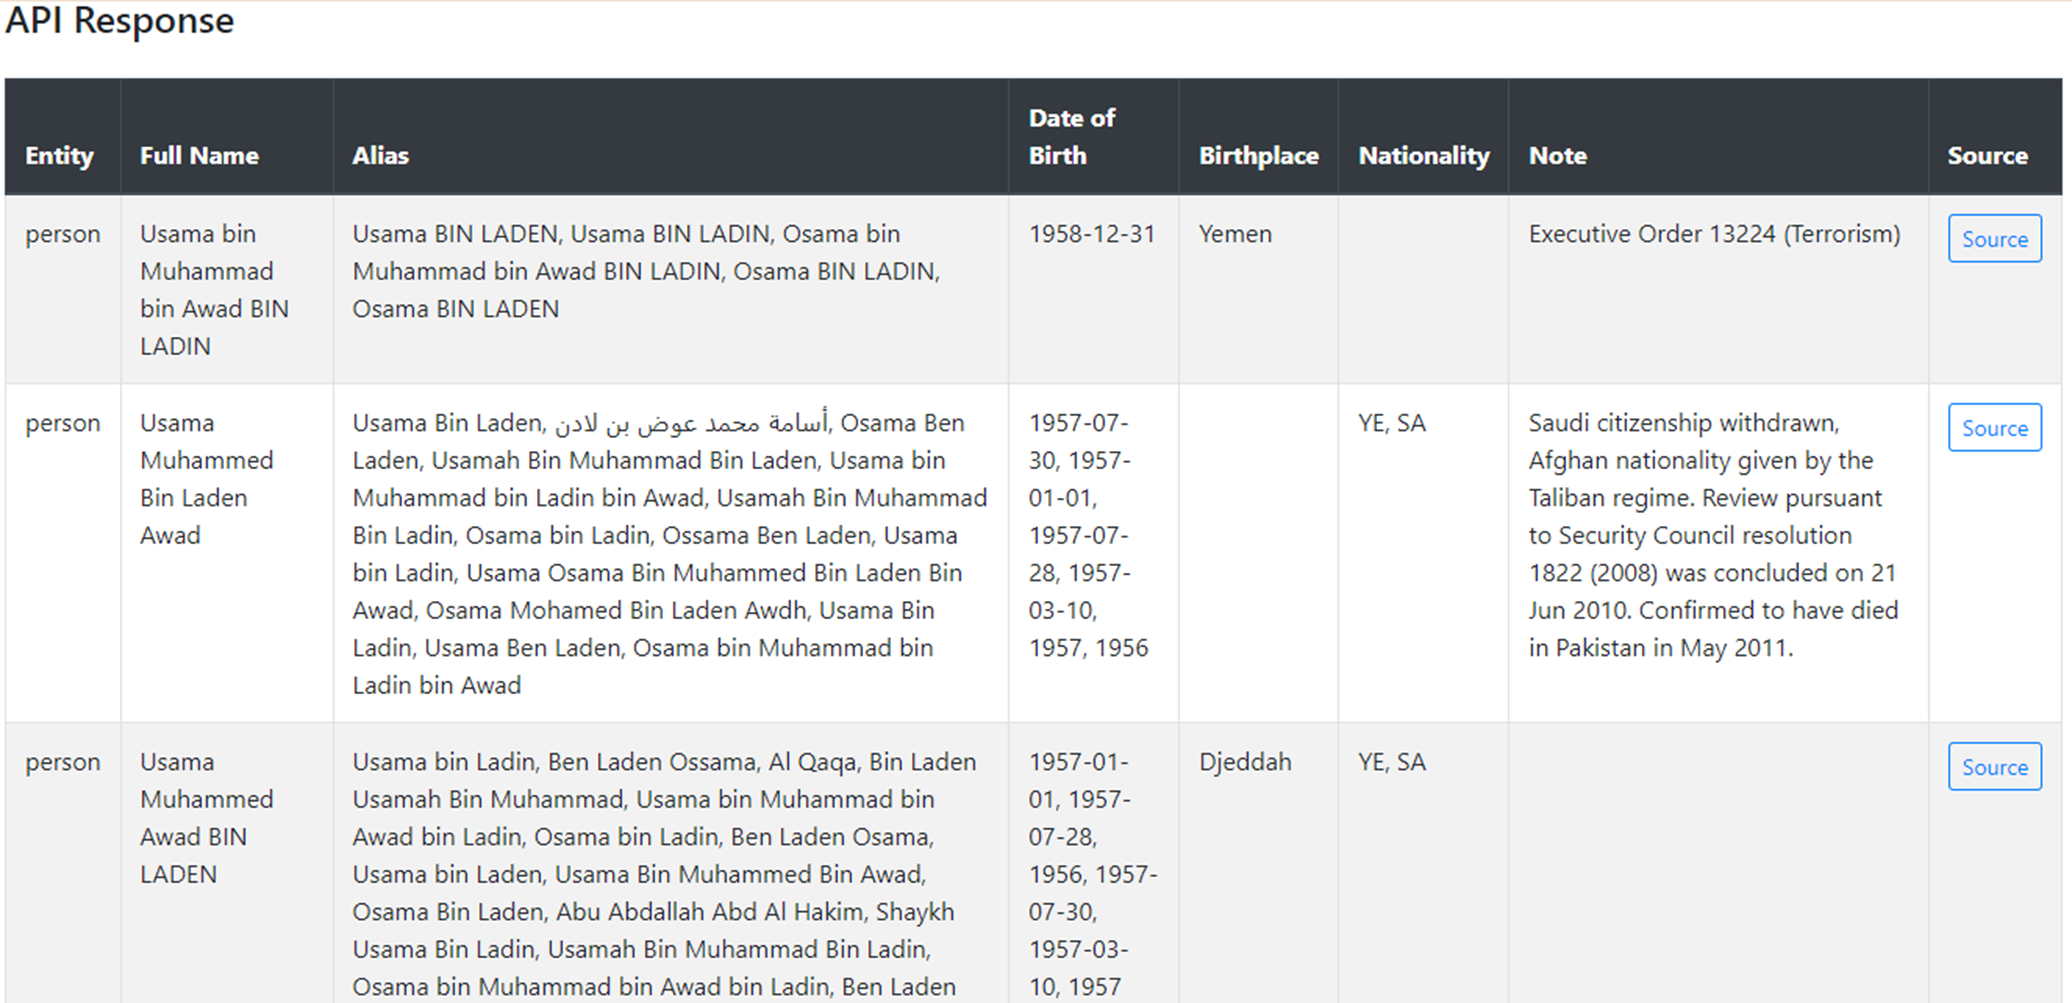
As you can see there are some matches found for this name.
Without preprocessing the response, the response looks like this:
{"match":\[{"alias":["Usama BIN LADEN","Usama BIN LADIN","Osama bin Muhammad bin Awad BIN LADIN","Osama BIN LADIN","Osama BIN LADEN"],"birthplace":["Yemen"],"database":"us_ofac","dob":["1958-12-31"],"documentnumber":null,"entity":"person","fullname":["Usama bin Muhammad bin Awad BIN LADIN"],"note":["Executive Order 13224 (Terrorism)"],"program":["SDN List"],"schema":"sanction","source":["https://www.treasury.gov/resource-center/sanctions/Pages/default.aspx"],"time":"1998-08-21T06:00:00+08:00"},{"alias":["Usama Bin Laden","أسامة محمد عوض بن لادن","Osama Ben Laden","Usamah Bin Muhammad Bin Laden","Usama bin Muhammad bin Ladin bin Awad","Usamah Bin Muhammad Bin Ladin","Osama bin Ladin","Ossama Ben Laden","Usama bin Ladin","Usama Osama Bin Muhammed Bin Laden Bin Awad","Osama Mohamed Bin Laden Awdh","Usama Bin Ladin","Usama Ben Laden","Osama bin Muhammad bin Ladin bin Awad"],"database":"ch_seco","dob":["1957-07-30","1957-01-01","1957-07-28","1957-03-10","1957","1956"],"documentnumber":null,"entity":"person","firstname":["أسامة محمد عوض بن لادن","Usamah","Usama","Ossama","Osama"],"fullname":["Usama Muhammed Bin Laden Awad"],"lastname":["Ben Laden","Bin Ladin","bin Ladin","Bin Laden"],"nationality":["YE","SA"],"note":["Saudi citizenship withdrawn, Afghan nationality given by the Taliban regime. Review pursuant to Security Council resolution 1822 (2008) was concluded on 21 Jun 2010. Confirmed to have died in Pakistan in May 2011."],"program":["Ordinance of 2 October 2000 on measures against individuals and entities associated with Usama bin Laden, the group «Al-Qaïda» or the Taliban (SR 946.203), annex 2"],"schema":"sanction","source":["https://www.seco.admin.ch/seco/en/home/Aussenwirtschaftspolitik_Wirtschaftliche_Zusammenarbeit/Wirtschaftsbeziehungen/exportkontrollen-und-sanktionen/sanktionen-embargos.html"],"time":"2013-03-08T07:00:00+08:00"},{"alias":["Usama bin Ladin","Ben Laden Ossama","Al Qaqa","Bin Laden Usamah Bin Muhammad","Usama bin Muhammad bin Awad bin Ladin","Osama bin Ladin","Ben Laden Osama","Usama bin Laden","Usama Bin Muhammed Bin Awad, Osama Bin Laden","Abu Abdallah Abd Al Hakim","Shaykh Usama Bin Ladin","Usamah Bin Muhammad Bin Ladin","Osama bin Muhammad bin Awad bin Ladin","Ben Laden Usama","Bin Laden Osama Mohamed Awdh"],"birthplace":["Djeddah"],"database":"fr_tresor_gels_avoir","dob":["1957-01-01","1957-07-28","1956","1957-07-30","1957-03-10","1957"],"documentnumber":null,"entity":"person","fullname":["Usama Muhammed Awad BIN LADEN"],"nationality":["YE","SA"],"schema":"sanction","source":["https://gels-avoirs.dgtresor.gouv.fr/"],"status":["Hajj","Shaykh"],"time":null},{"alias":["Usama Muhammed Awad Bin Laden","Osama bin Ladin","Osama bin Muhammad bin Awad bin Ladin","Shaykh Usama Bin Ladin","Bin Laden Osama Mohamed Awdh","Ben Laden Ossama","Al Qaqa","Usama bin Laden","Ben Laden Usama","Usama bin Muhammad bin Awad bin Ladin","Abu Abdallah Abd Al-Hakim","Usama Bin Muhammed Bin Awad, Osama Bin Laden","Usamah Bin Muhammad Bin Ladin","Usama bin Ladin","Ben Laden Osama"],"birthplace":["Jeddah"],"database":"eu_fsf","dob":["1957-01-01","1957-03-10","1957-07-30","1957-07-28"],"documentnumber":null,"entity":"person","firstname":["Usama","Osama"],"fullname":["Bin Laden Usamah Bin Muhammad"],"lastname":["Bin Laden","bin Ladin"],"middlename":["bin Muhammad bin Awad","Muhammed Awad"],"nationality":["AF"],"note":["Other information: Confirmed to have died in Pakistan in May 2011. Date of designation referred to in Article 2a(4)(b): 25.1.2001."],"program":["TAQA - 596/2013 (OJ L172)"],"schema":"sanction","source":["http://eur-lex.europa.eu/LexUriServ/LexUriServ.do?uri=OJ:L:2013:172:0001:0003:EN:PDF"],"time":""}],"executionTime":0.002786168}
API Test
We can test the API without creating the web application. This can be done very easily by following the below simple steps.
Go to the AML API link of ID Analyzer.
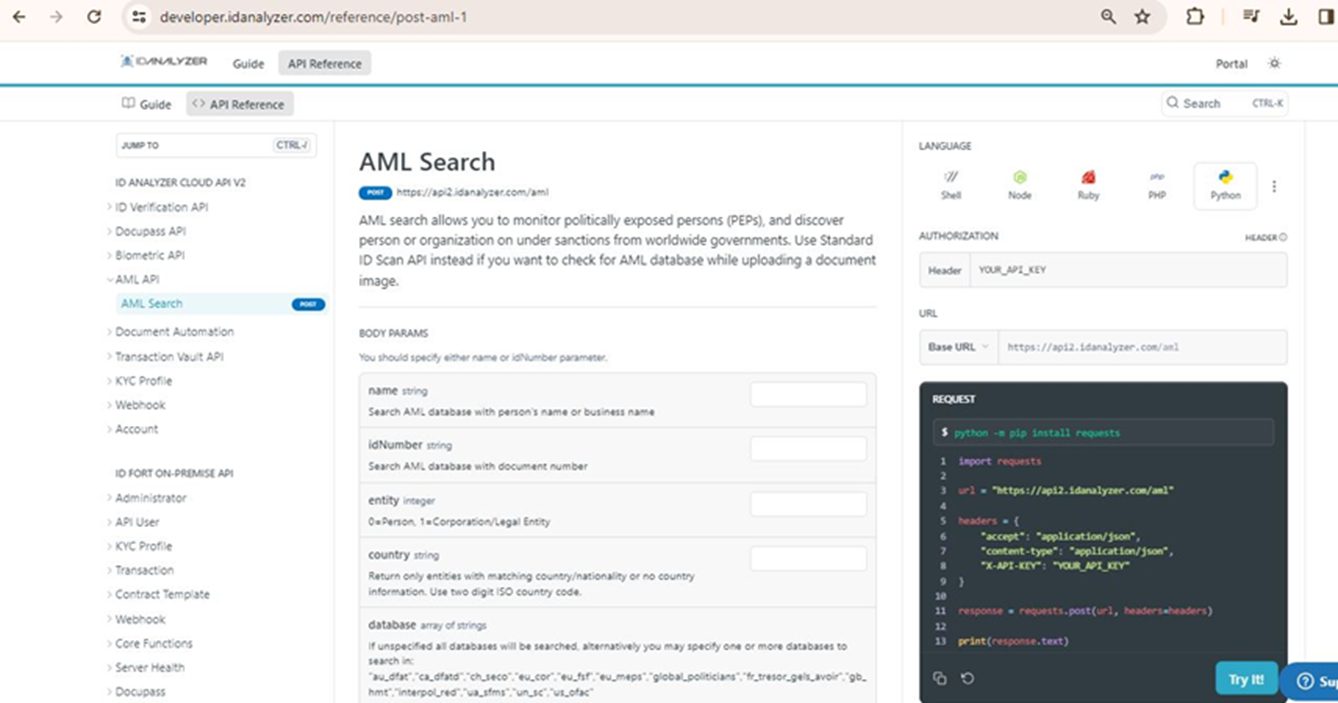
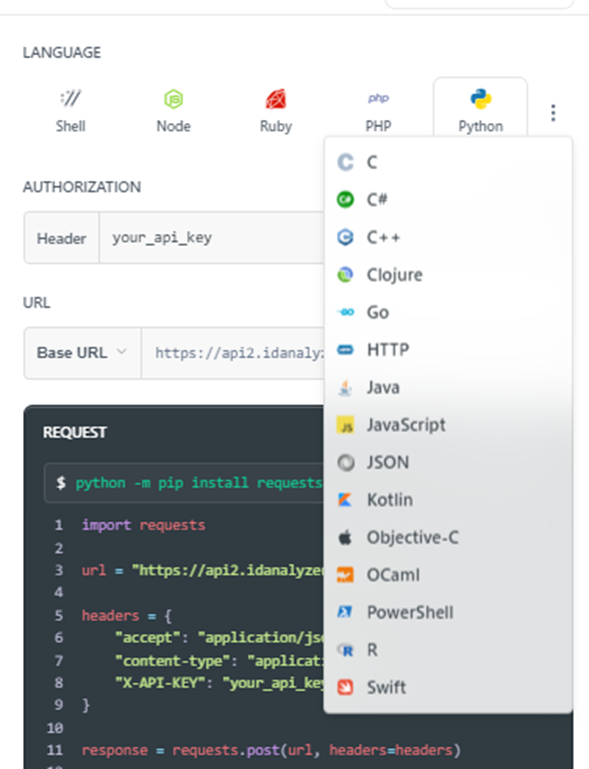
The ID Analyzer gives us support for using there API in many languages.
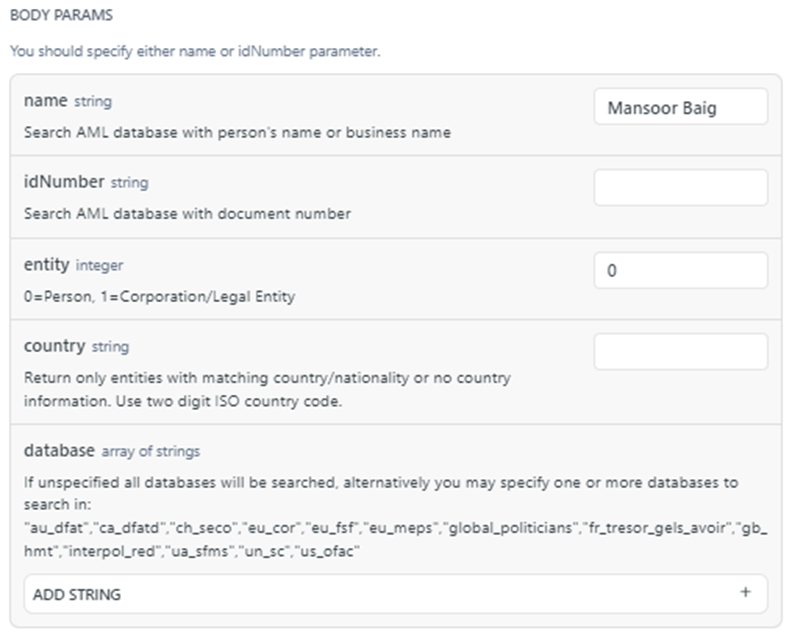
In the “BODY PARAMS”, you can see different input fields. In these fields I will add my data.
For the first example I will add any name and entity. For person check, the entity should be 0.
Below is the response.
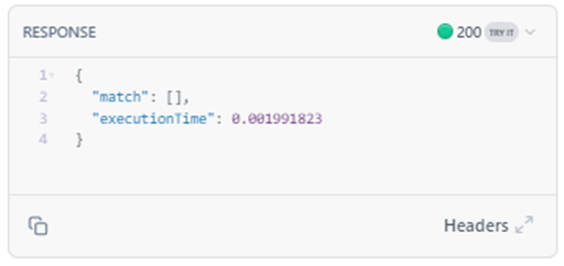
We can see that there is no response for the input name. Now I will enter a different name and see how it works.
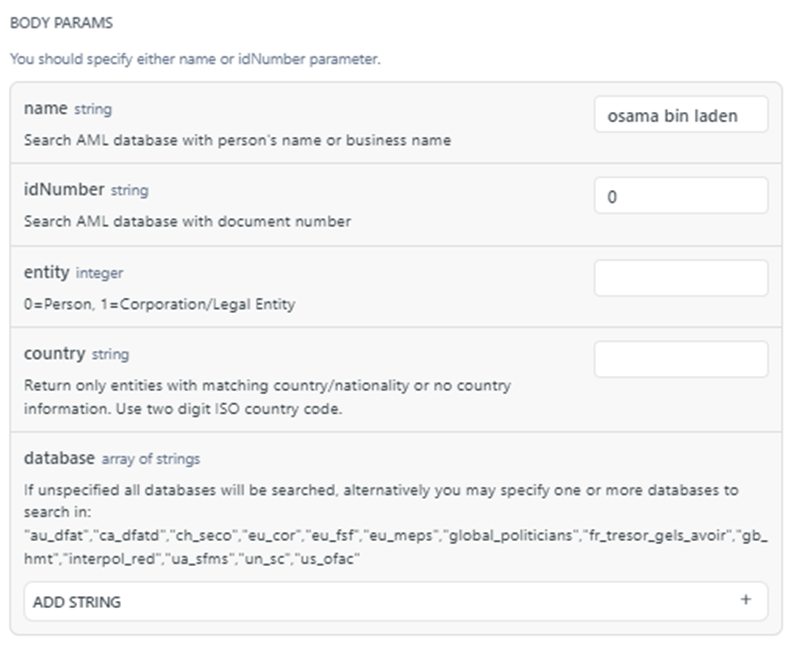
And this is the response in the response window.
{
  "match": \[
    {
      "alias": [
        "Usama BIN LADEN",
        "Usama BIN LADIN",
        "Osama bin Muhammad bin Awad BIN LADIN",
        "Osama BIN LADIN",
        "Osama BIN LADEN"
      ],
      "birthplace": [
        "Yemen"
      ],
      "database": "us_ofac",
      "dob": [
        "1958-12-31"
      ],
      "documentnumber": null,
      "entity": "person",
      "fullname": [
        "Usama bin Muhammad bin Awad BIN LADIN"
      ],
      "note": [
        "Executive Order 13224 (Terrorism)"
      ],
      "program": [
        "SDN List"
      ],
      "schema": "sanction",
      "source": [
        "https://www.treasury.gov/resource-center/sanctions/Pages/default.aspx"
      ],
      "time": "1998-08-21T06:00:00+08:00"
    },
    {
      "alias": [
        "Usama Bin Laden",
        "أسامة محمد عوض بن لادن",
        "Osama Ben Laden",
        "Usamah Bin Muhammad Bin Laden",
        "Usama bin Muhammad bin Ladin bin Awad",
        "Usamah Bin Muhammad Bin Ladin",
        "Osama bin Ladin",
        "Ossama Ben Laden",
        "Usama bin Ladin",
        "Usama Osama Bin Muhammed Bin Laden Bin Awad",
        "Osama Mohamed Bin Laden Awdh",
        "Usama Bin Ladin",
        "Usama Ben Laden",
        "Osama bin Muhammad bin Ladin bin Awad"
      ],
      "database": "ch_seco",
      "dob": [
        "1957-07-30",
        "1957-01-01",
        "1957-07-28",
        "1957-03-10",
        "1957",
        "1956"
      ],
      "documentnumber": null,
      "entity": "person",
      "firstname": [
        "أسامة محمد عوض بن لادن",
        "Usamah",
        "Usama",
        "Ossama",
        "Osama"
      ],
      "fullname": [
        "Usama Muhammed Bin Laden Awad"
      ],
      "lastname": [
        "Ben Laden",
        "Bin Ladin",
        "bin Ladin",
        "Bin Laden"
      ],
      "nationality": [
        "YE",
        "SA"
      ],
      "note": [
        "Saudi citizenship withdrawn, Afghan nationality given by the Taliban regime. Review pursuant to Security Council resolution 1822 (2008) was concluded on 21 Jun 2010. Confirmed to have died in Pakistan in May 2011."
      ],
      "program": [
        "Ordinance of 2 October 2000 on measures against individuals and entities associated with Usama bin Laden, the group «Al-Qaïda» or the Taliban (SR 946.203), annex 2"
      ],
      "schema": "sanction",
      "source": [
        "https://www.seco.admin.ch/seco/en/home/Aussenwirtschaftspolitik_Wirtschaftliche_Zusammenarbeit/Wirtschaftsbeziehungen/exportkontrollen-und-sanktionen/sanktionen-embargos.html"
      ],
      "time": "2013-03-08T07:00:00+08:00"
    },
    {
      "alias": [
        "Usama bin Ladin",
        "Ben Laden Ossama",
        "Al Qaqa",
        "Bin Laden Usamah Bin Muhammad",
        "Usama bin Muhammad bin Awad bin Ladin",
        "Osama bin Ladin",
        "Ben Laden Osama",
        "Usama bin Laden",
        "Usama Bin Muhammed Bin Awad, Osama Bin Laden",
        "Abu Abdallah Abd Al Hakim",
        "Shaykh Usama Bin Ladin",
        "Usamah Bin Muhammad Bin Ladin",
        "Osama bin Muhammad bin Awad bin Ladin",
        "Ben Laden Usama",
        "Bin Laden Osama Mohamed Awdh"
      ],
      "birthplace": [
        "Djeddah"
      ],
      "database": "fr_tresor_gels_avoir",
      "dob": [
        "1957-01-01",
        "1957-07-28",
        "1956",
        "1957-07-30",
        "1957-03-10",
        "1957"
      ],
      "documentnumber": null,
      "entity": "person",
      "fullname": [
        "Usama Muhammed Awad BIN LADEN"
      ],
      "nationality": [
        "YE",
        "SA"
      ],
      "schema": "sanction",
      "source": [
        "https://gels-avoirs.dgtresor.gouv.fr/"
      ],
      "status": [
        "Hajj",
        "Shaykh"
      ],
      "time": null
    },
    {
      "alias": [
        "Usama Muhammed Awad Bin Laden",
        "Osama bin Ladin",
        "Osama bin Muhammad bin Awad bin Ladin",
        "Shaykh Usama Bin Ladin",
        "Bin Laden Osama Mohamed Awdh",
        "Ben Laden Ossama",
        "Al Qaqa",
        "Usama bin Laden",
        "Ben Laden Usama",
        "Usama bin Muhammad bin Awad bin Ladin",
        "Abu Abdallah Abd Al-Hakim",
        "Usama Bin Muhammed Bin Awad, Osama Bin Laden",
        "Usamah Bin Muhammad Bin Ladin",
        "Usama bin Ladin",
        "Ben Laden Osama"
      ],
      "birthplace": [
        "Jeddah"
      ],
      "database": "eu_fsf",
      "dob": [
        "1957-01-01",
        "1957-03-10",
        "1957-07-30",
        "1957-07-28"
      ],
      "documentnumber": null,
      "entity": "person",
      "firstname": [
        "Usama",
        "Osama"
      ],
      "fullname": [
        "Bin Laden Usamah Bin Muhammad"
      ],
      "lastname": [
        "Bin Laden",
        "bin Ladin"
      ],
      "middlename": [
        "bin Muhammad bin Awad",
        "Muhammed Awad"
      ],
      "nationality": [
        "AF"
      ],
      "note": [
        "Other    information:    Confirmed  to  have  died  in  Pakistan  in  May  2011.  Date  of  designation  referred  to  in  Article  2a(4)(b):  25.1.2001."
      ],
      "program": [
        "TAQA - 596/2013 (OJ L172)"
      ],
      "schema": "sanction",
      "source": [
        "http://eur-lex.europa.eu/LexUriServ/LexUriServ.do?uri=OJ:L:2013:172:0001:0003:EN:PDF"
      ],
      "time": ""
    }
  ],
  "executionTime": 0.002630892
}
Conclusion
Navigating the complexities of Anti-Money Laundering (AML) compliance is a critical challenge for modern businesses. Through the creation of a web application using ID Analyzer's AML API, we've demonstrated a powerful approach to simplifying compliance processes. This journey from setting up a development environment to the local deployment of our application underscores the potential of technology to enhance AML efforts.
The development phases outlined in this guide serve as a blueprint for leveraging tech solutions in compliance strategies. While the fight against financial crimes is ongoing, tools like the ID Analyzer AML API equip businesses with the necessary resources to meet these challenges head-on.
Let this guide inspire your efforts to strengthen your compliance measures. In the dynamic landscape of AML regulations, staying informed and adaptable is key to fostering a secure and transparent business environment.
Updated almost 2 years ago
